Classic UI
Introduction
Flex²B is available is several front-ends. The Classic, formerly called Windows, interface is around for years. This help and documentation environment does not have the ambition to replace that documentation, nor to extend it here. When you want to have more information, we refer to the document: End User & help desk manual , Classic UI, Background, Best Practices.
Some YouTube videos are available to give you some insights on the application and the first steps into the environment. 
Fast walk through
Although this documentation has no intention to describe the classic UI, we are putting here a quick start guide on the Classic UI. It might be a recognizable environment for users of the first hour.
Flex²B is the software that is used to collect the information for the logistics, quality, positioning, food safety and inventory activities. It is a collection of applications. Here is a brief overview of the most important modules.

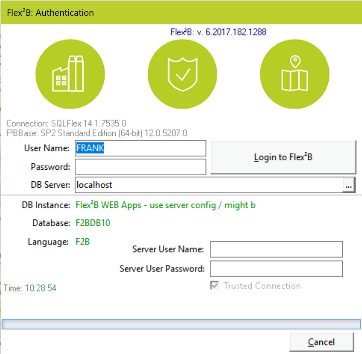
On your Windows PC desktop, you should see an icon such as this. Double-click on this icon to start the application.
First you need to fill in the username and password
and database to log into the Flex²B System.
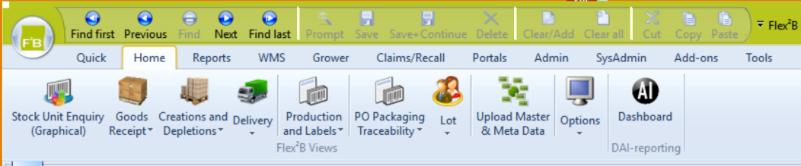
In Flex²B you can navigate through the application by selecting menu items with the mouse, or the TAB key on your keyboard. Forms that are gray shaded are not editable.
In the toolbar, you will find several buttons that give you the ability for a mouse action. The black arrows give you the opportunity to browse forward, backwards through a certain information entity… (eg a stock unit using the short stock unit number or the SSCC code, descriptions etc). You can use a barcode scanner, attached to your computer for faster data input. Using the icon displayed as a ‘diskette’, you can save the data to the computer.
Whenever you are in a table view, and you leave a certain row, an automatic ‘save’ will happen.
Whenever an error pops up, you should carefully read the message and make the modifications if requested. As from the moment that you do not understand the question, you can consult the helpdesk.
You can also use the function keys on top of your keyboard to control the application.
Overview of most important function keys:
- F9 / F7 / F8: find item (i.e. stock unit), previous and next
- F5: clear the contents from the screen
- F2: save the information to the computer

Stock unit Enquiry
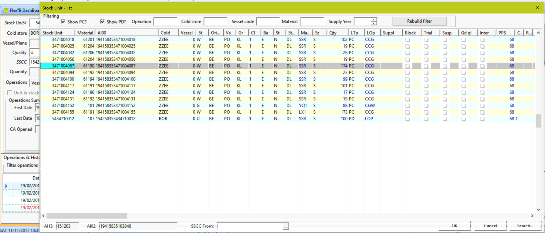
The stock unit enquiry is an important module to consult the specifications of a certain stock unit. You can start it from the ‘View’ menu, clicking on the line with stock unit inquiry.
The following module will be shown. 
This module gives you the opportunity to enter the short stock unit code or the SSCC code (without the 00 in the beginning) and search the stock unit using the function keys or the toolbar.
You can also click on the button![]() . Whenever you see such a button, you can assume that there is a selection list attached to it. A selection list gives you the ability to search in a big pool for certain information. Click on the header of a column tries to sort the information using that column. Clicking on the search button allows you to type in the first part of the information, so that the list automatically will position you on the appropriate information.
. Whenever you see such a button, you can assume that there is a selection list attached to it. A selection list gives you the ability to search in a big pool for certain information. Click on the header of a column tries to sort the information using that column. Clicking on the search button allows you to type in the first part of the information, so that the list automatically will position you on the appropriate information.
In the stock unit inquiry, you can click on the button ‘AI Print’ to print a label with all ‘application identifier’ information on it, in short a ‘stock unit label’.
In the above module, you can also recognize some ‘tab pages’. Clicking on a tab page will bring a hidden tab page and its information to the top. You can now consult the information on that tab page.
Note. A PDA version of the application is available on your hand held device.
Delivery module
The look and feel of the delivery module is comparable to the stock unit inquiry. You can start this module through the menu ‘View - Operations Management’ 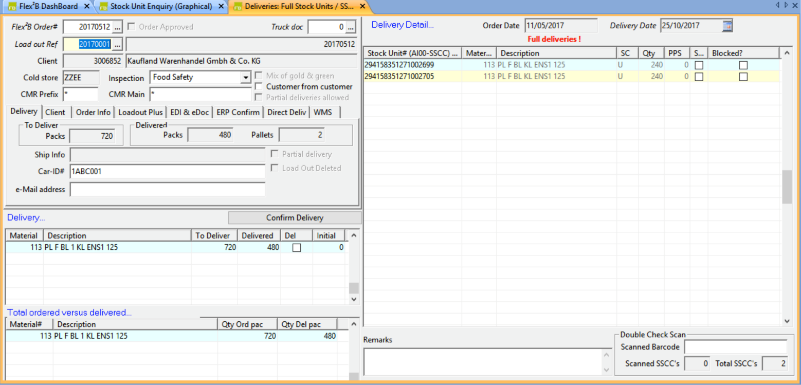
You should start by entering the ‘Order number’ and the ‘Load out’ reference.
When this information is available but not yet loaded in the system, you can click on the button ‘upload to deliver’, and in the next screen, click on the button ‘select all’ followed by import.
The information will be loaded in the system. In some cool stores, this information is not supplied. This means that you should first enter the ‘Delivery’ part in the according table (see screenshot). Once that the ‘delivery’ information and the ‘ordered versus delivered’ is available and the sales order is active on the screen, you can select the ‘delivery detail’ table.
Assign an empty truck document per truck, you then print a truck document that accompanies the truck driver.
You can now enter the stock unit numbers that you have put on the truck. Notice that a set of checks will be executed, to check whether that stock unit is allowed for that order.
![]()
You can now enter or scan the SSCC codes of the stock unit numbers and put them in the delivery table. Once all stock units are entered, you should print the truck document and give it to the truck driver, and approve the ‘delivery’ by pressing the ‘approve delivery’ button.
The order is now closed and cannot be changed any more.
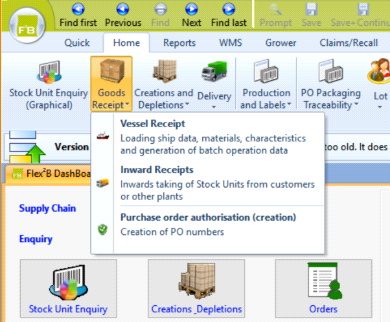
Goods Receipt
The ‘Goods receipt’ is the module that needs to be used when stock units are entering a cool store other than by a vessel discharge. i.e. inter cool store transfer, return from panelist etc.
This module can be started from the ‘View – Operations Management – Goods Receipt’ menu.
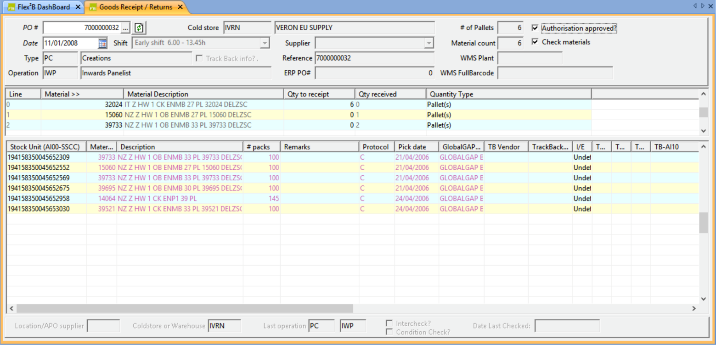
You should first enter a ‘PO number’. If it is not available from the current database, you can use the ‘recycle’ button on the right of the PO# form. This will try to collect the information from the central site. Once you have selected a valid PO#, you can enter the SSCC codes of the stock units into the table. It will grab all stock unit information from the central site.
Technical tip: This functionality is only available on those workstations that can access the web server in Antwerp through routing. There is a PDA version for this module.
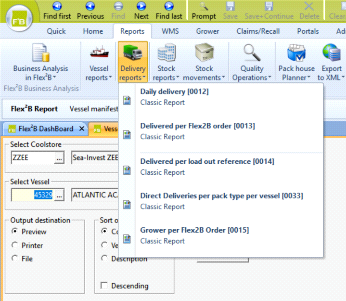
Reporting
The reporting menu has many standard reports. After clicking on the report you want, you enter the selection criteria needed to run the report.
Next, you need to indicate whether to print it to screen (preview) or print it to your default printer. Make additional selections where appropriate and click the ‘Print button’. The report will generate an output. When printing to the screen, you will get a component that looks like.

Cold store / Vessel Management
This module is activated through the menu ‘View – Vessel Management – Cool Store Vessel Management’.
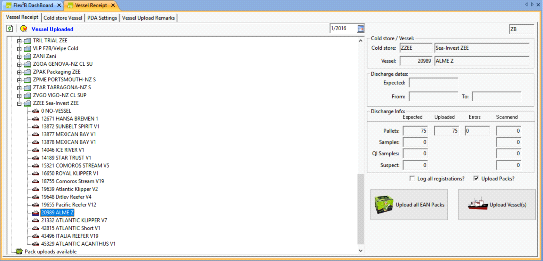
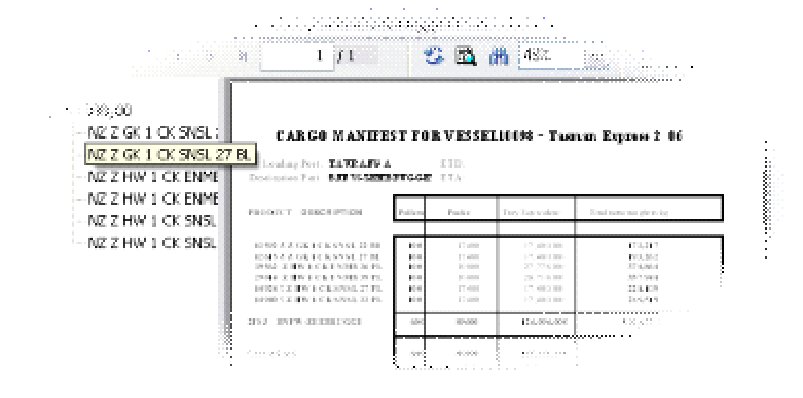
This module displays information in the database that came in through vessel manifests, master files with product information etc.
When a new vessel is about to arrive, a vessel manifest is provided. In the left part of the screen, you will see a tree view. You can move around in that part by clicking on the + sign in front of some icons. That part will show additional information.
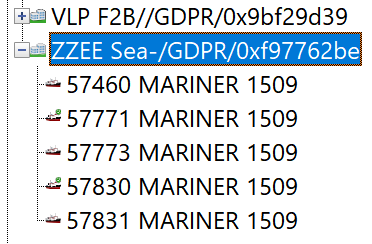
When you want to upload multiple vessel manifests, you should double click on the vessel code / name. The icon will change to a 'selected vessel' state. When invoking the "upload vessel(s)" button, the application will auto upload all selected vessels.
In this sample, you see that there are 2 vessel manifest nodes that are selected.
![]()
Whenever you need to refresh this information, press this refresh button on top of the tree view.
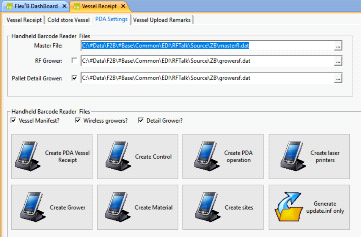
- If you need to upload new master information, click on the ‘upload master’ button. Typically manifest data is uploaded to the central database from the port of departure. It is then available for use by receiving ports and warehouses.
- If you need to generate information that is needed by the PDA application (in batch), you can click the according button out of the set of 7 buttons… ‘Create master’ up to ‘create applicator’.
- If you need to upload a vessel into the system, browse to the code of your cool store.
Click on the + sign if not all information is available.
You should now double-click on the vessel-code and vessel-name. The icon will change to a white cross.
When you click on the ‘upload vessel’ button, the information will be stored in the database.
- It is not guaranteed that all information can be stored in the database. When errors occur, please consult your port administrator or the helpdesk.
On the second tab page, you can visualize the status of a vessel, concerning the status of the vessel manifest upload and the current inwards scanned stock units.
Creation and depletion
The creation and depletion view is a core component whenever specific handling is done on a stock unit. For most components, there is a PDA version of the module.
A stock unit depletion in general means that a partial or complete stock unit is taken out of the stock. A stock unit creation general means that a partial or complete stock unit is made, that it has been put into stock and can be used for sales.
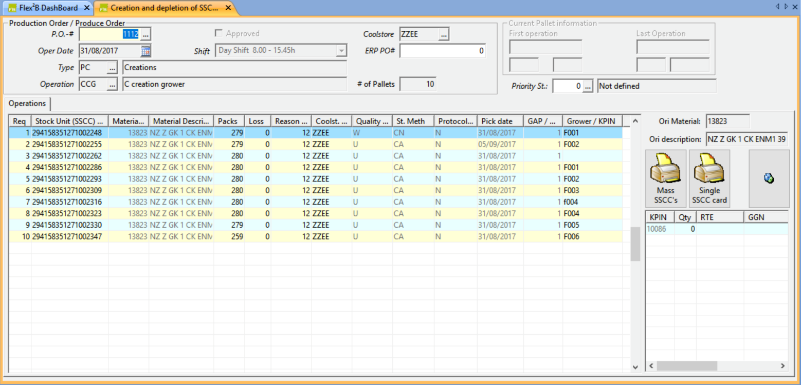
The module can be started from the ‘View – Operations Management – Creation Depletion’ menu.
You will have a blank view when started. You first need to create the heading information. Leave the PO# blank, but fill in all other fields. When you move to the table part of the module, it will ask you whether it should save that heading information. Click on ‘Yes’!
The module is SSCC based, meaning that you need to enter the long stock unit number. You can use a keyboard GS128 barcode scanner. You can now be in ‘creation’ or ‘depletion’ mode.
Each mode has a specific set of business rules that need to be applied. Only the columns where you need to change data are accessible.
When starting a new row, it will propose some default values based on the previous line. When you are on a new line, but you want to scroll in the list, you might want to press F5, before you can navigate (cf. the default values)
Whenever you exit a row, it will try to save the information in that line.
Some operations have the characteristic that a grower is needed. When saving that row, it will automatically position you in the grower table.