Server side API's
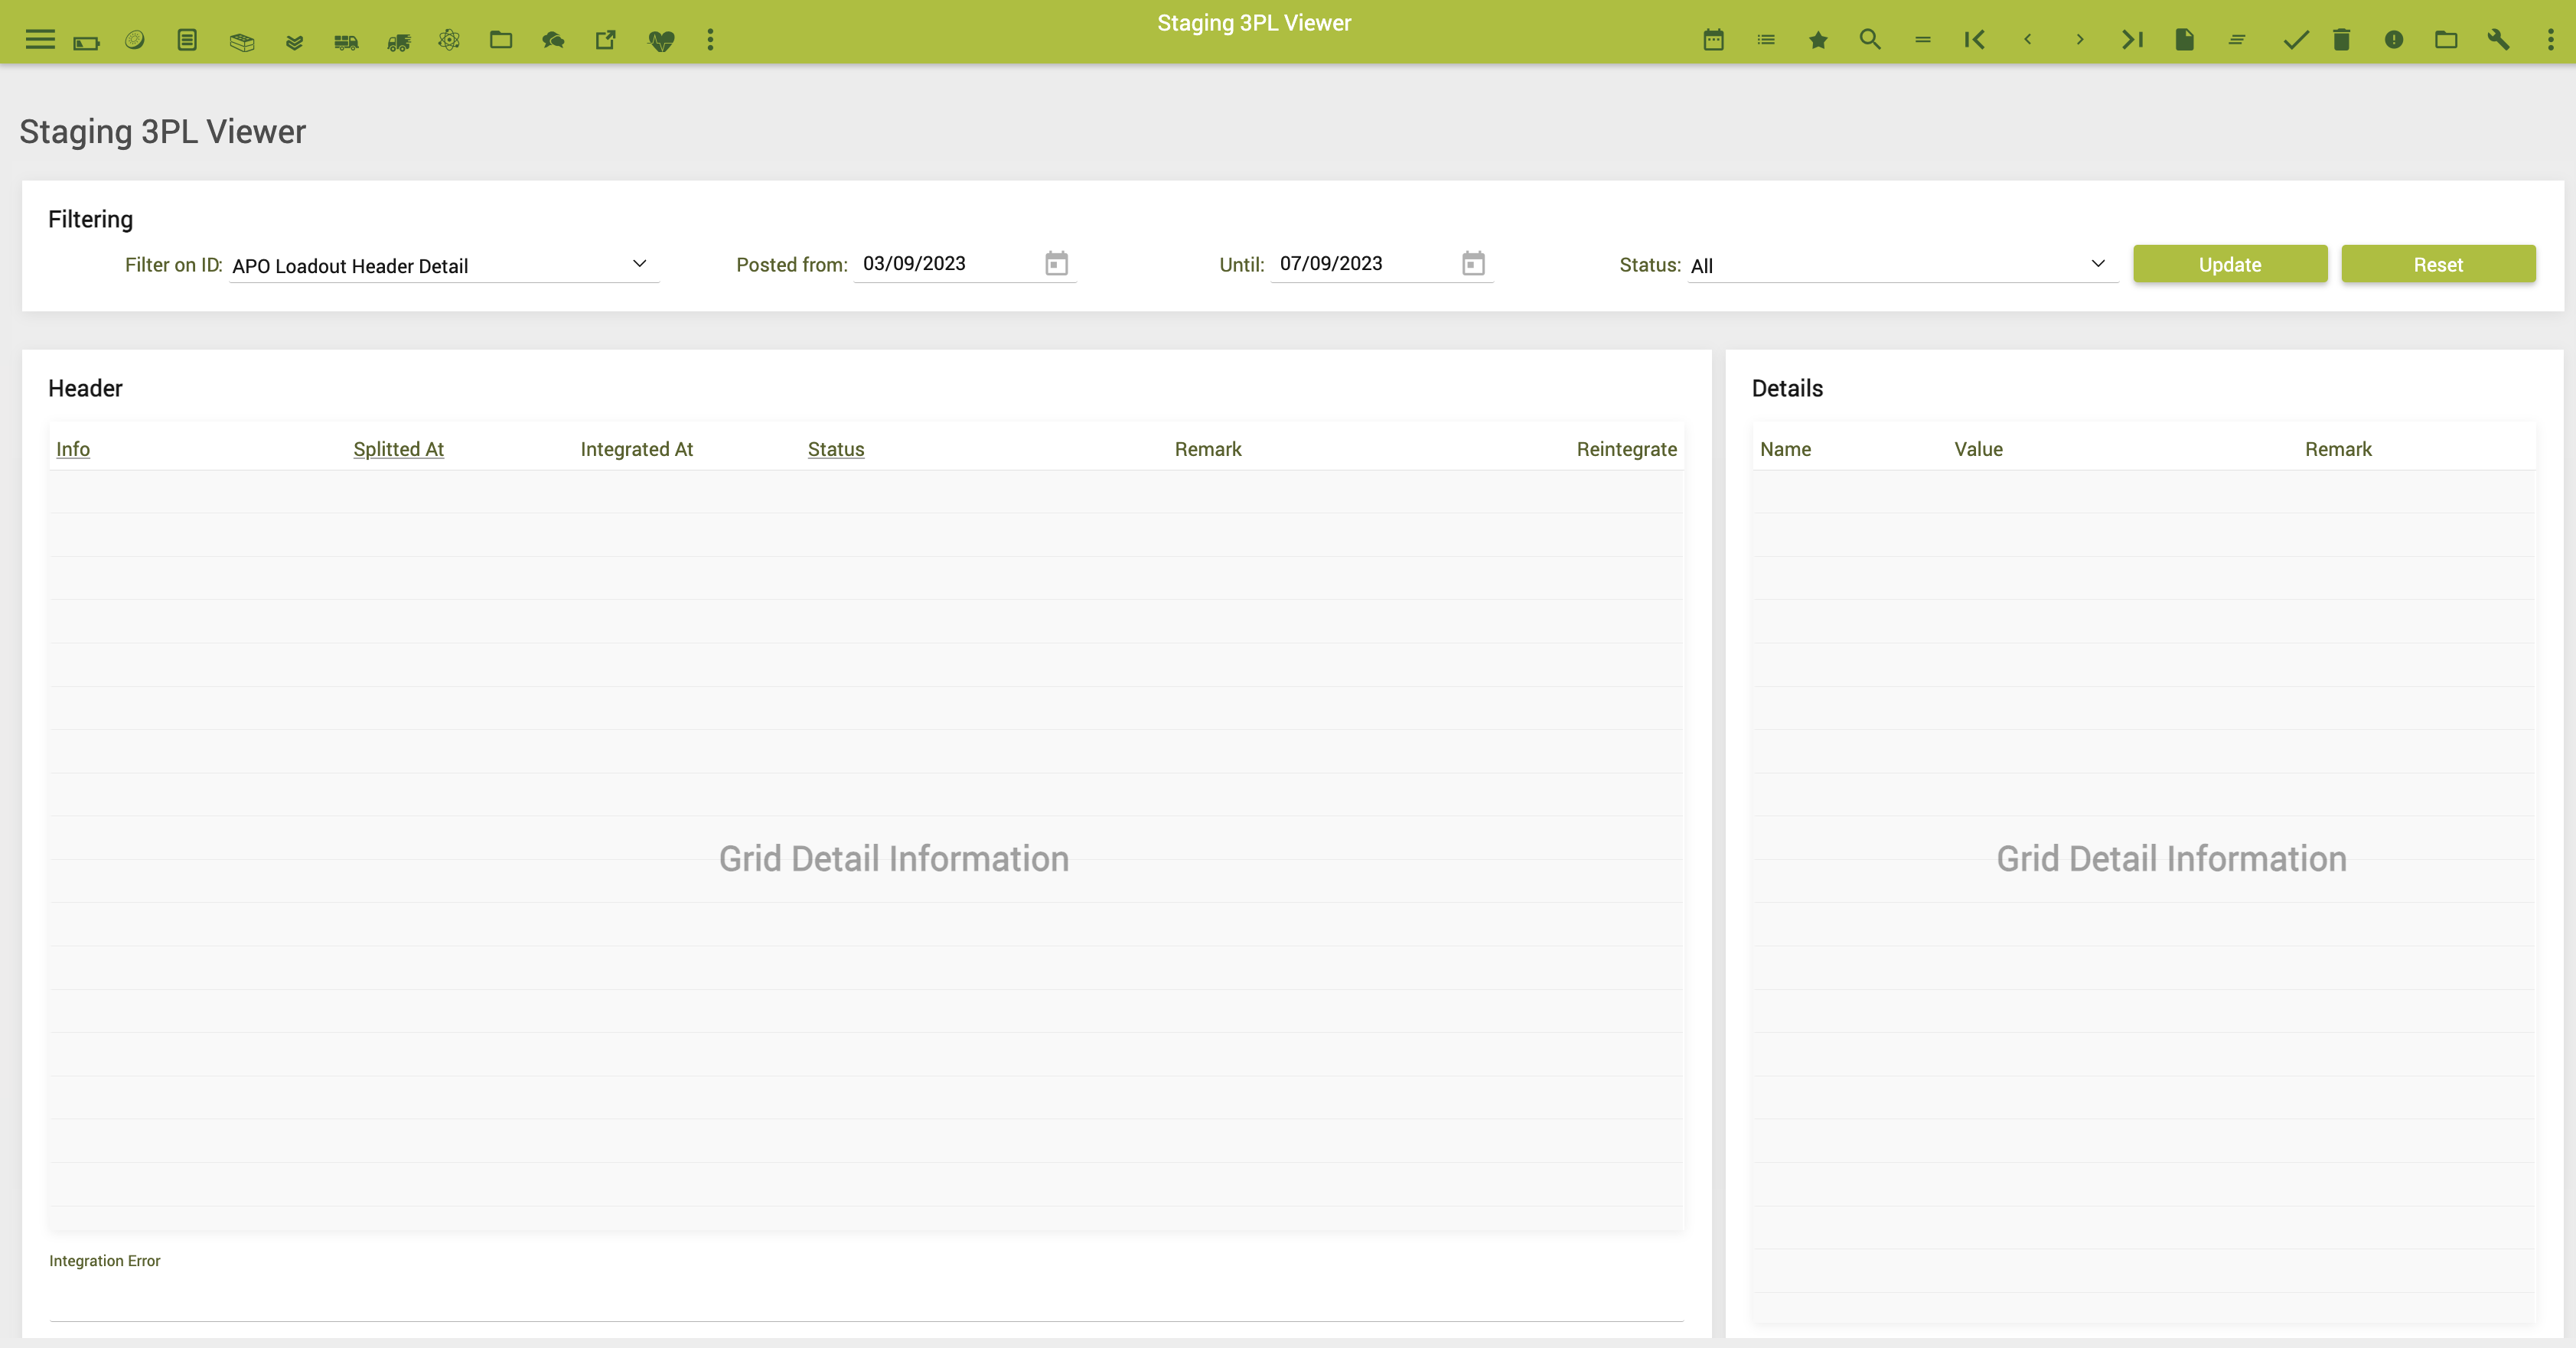
The visualisation for the management components can be found by a SysAdmin user in the Flex²B Cloud version:
- Hamburger Menu
- Sysadmin
- API for 3PLs
|
|
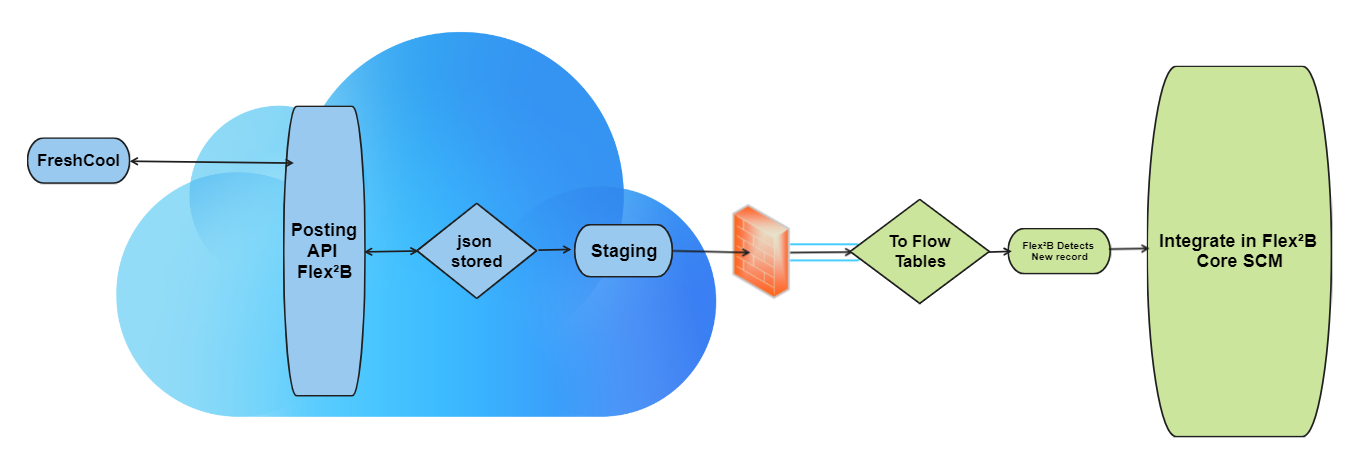
The data is to be sourced from produce creations, aka Produce inventory and deliveries in the 3PL system. The data is posted over a public API on Flex²B Server. The specific movements that this API deals with are the produce creations and the deliveries. Integration with suppliers and 3PLs will be divided into areas:
|
|
|
The 3PL API has been set up according to the REST principle. All responses from the API, including error messages, have been formatted in JSON format. |
The API
API base URL
This API is available only through https.
https://<servername>/ (will be defined)
Overview of used HTTP status codes
200 OK Everything is in order
400 Bad Request Incomplete input
401 Unauthorized No valid token was provided
402 Request Failed Input was in order, but request was not processed
403 Invalid Token The used token is invalid or no longer valid
404 Entity not known The requested object does not exist/could not be located
499 Invalid contenttype
500 Server Error Error detected on Flex2B side
Available URL patterns
/v1/generatetoken
/v1/replicationpost
Authentication
GET /v1/generatetoken
An industry-standard model of using a token to access all web-services has been implemented. This requires the requester to request an authentication token before using any of the specified endpoints. If the requester forsakes to do this, the web-services will simply return an ‘invalid token’ response.
How to request a token
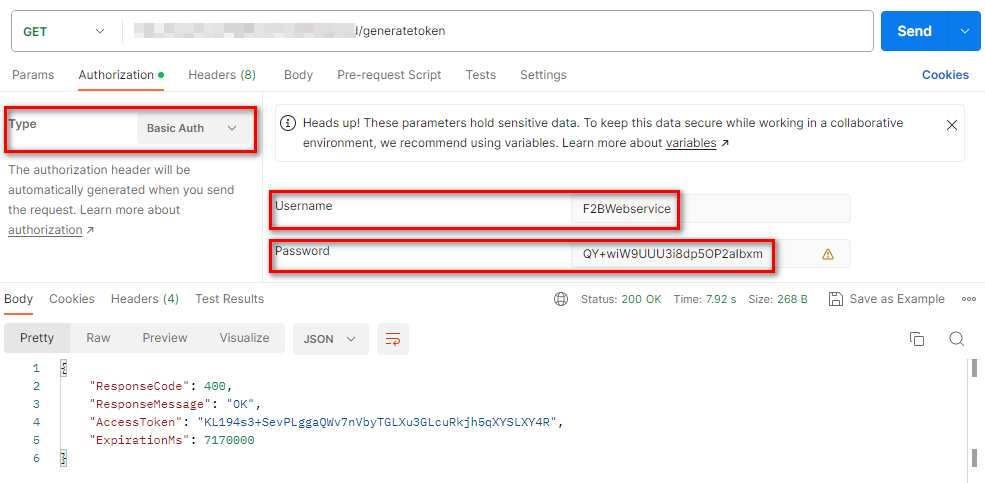
As stated in the introduction, the requester requests a token from the Flex2B API GET endpoint named ‘generatetoken’. This endpoint expects a ‘Content-Type’ header of ‘application/json; charset=utf8’ as all other endpoints do. In addition to this header, it also expects an ‘Authorization’ header. This ‘Authorization’ header should consist of the word ‘Basic’, followed by a singular space, followed by a base64-encoded string of a username and password. The username and password should be separated with a colon character before encoding it as base64. The username and password may be requested from Flex2B as there is no official internet interface to gather these details.
A sample call from Postman to obtain an accesstoken should look like this:
(Username and password will be provided by the Flex2B SysAdmins, screenshot is from a test account)
Token details
The returned json will look like the following:
{
"ResponseCode": 200,
"ResponseMessage": "OK",
"AccessToken": "1fjp ... SK/l3P",
"ExpirationMs": 30000
}
There will be a response code, a response message, the token itself and the expiration time. The response code will give a quick indication of whether the request was successful or not. The response message will give a more detailed explanation of the response code. When successful, a simple ‘OK’ sufficies. The access token is the token that should be used in any future POST requests, until the expiration time has been reached. The expiration time should be interpreted in milliseconds.
How to use the token
When sending any POST requests, the requester must check if their token is still valid and has not expired. Once the token has been determined to be usable, it should be included in an ‘Authorization’ header. In Postman this would look like the following:
![]()
The resulting output can be one of two options; either an ‘invalid token’ response will be returned if the token is invalid, or the requests will process as normal and will return a response as expected.
When the requester wants to send a new request to the Flex2B API, they should check whether their token is still valid. If it is not, they should request a new token from the FreshCool /Radford API token generator endpoint. This has to be done with a username and password, obtained from Flex2B. Once a token has been obtained, it may be used in the ‘Authorization’ header to execute further requests as normal.
POST /v1/replicationpost
This API is for transferring the pallet information to Flex2B
Body Parameters
The posting of the pallet info (replication lines) consists of a simple array containing information based on the following categories:
- Pallet header (“PH”)
- Pallet detail (“PD”)
- Historical movements (“HI”)
- Flex2B Order header (“OH”)
- Flex2B Order details (“OD”)
- 3PL Loadout Header (“LH”)
- 3PL loadout Header Detail (“DD”)
- 3PL Loadout Pallet detail (“LD”)
The information for each category is identified by an ‘apiid’ field and an array of single key/value pairs. The key value name corresponds with a dedicated field name within the F2B the database and must have a predefined value. A complete reference of available fields is added at the end of this document. The ‘value’ field contains the value for the specific ‘name’ item.
A small example of an (incomplete) replication post example is shown below:
{
"repLines": [
{
"apiuuid": "87277F40-6954-42F0-B191-A4A1DE476326",
“senderidentification”: “3PL-name”,
"nodes": [
{
"name": "pallet_#",
"value": "12345678"
},
{
"name": "coolstore_c",
"value": "1ABC"
}
]
},
{
"apiuuid": "4B50F6B8-3E9A-441B-A9CF-F585F8EE5F10",
"apiid": "PD",
“senderidentification”: “3PL-name”,
"nodes": [
{
"name": "pallet_#",
"value": "12345678"
},
{
"name": "grower_c",
"value": "agriculture1"
}
]
},
{
"apiuuid": "826B335E-49C1-4831-8916-F1A4F666008C",
"apiid": "HI",
“senderidentification”: “3PL-name”,
"nodes": [
{
"name": "Pallet",
"value": "12345678"
},
{
"name": "operation_date",
"value": "2023-06-26"
}
]
}
]
}
When the post is successfully delivered a JSON result will be passed back:
{
"ResponseCode": 200,
"ResponseMessage": "OK",
"CommunicationID": "44930 ... 485D3E"
}
For the future the ‘CommunicationID’ can be used the retrieve the processing result of the delivered post.
API fields and node information
Detailed information of the apiid fields and node information is available and can be delivered to potential 3PL's