Logon and base components
Login mechanisms in Flex²B Cloud
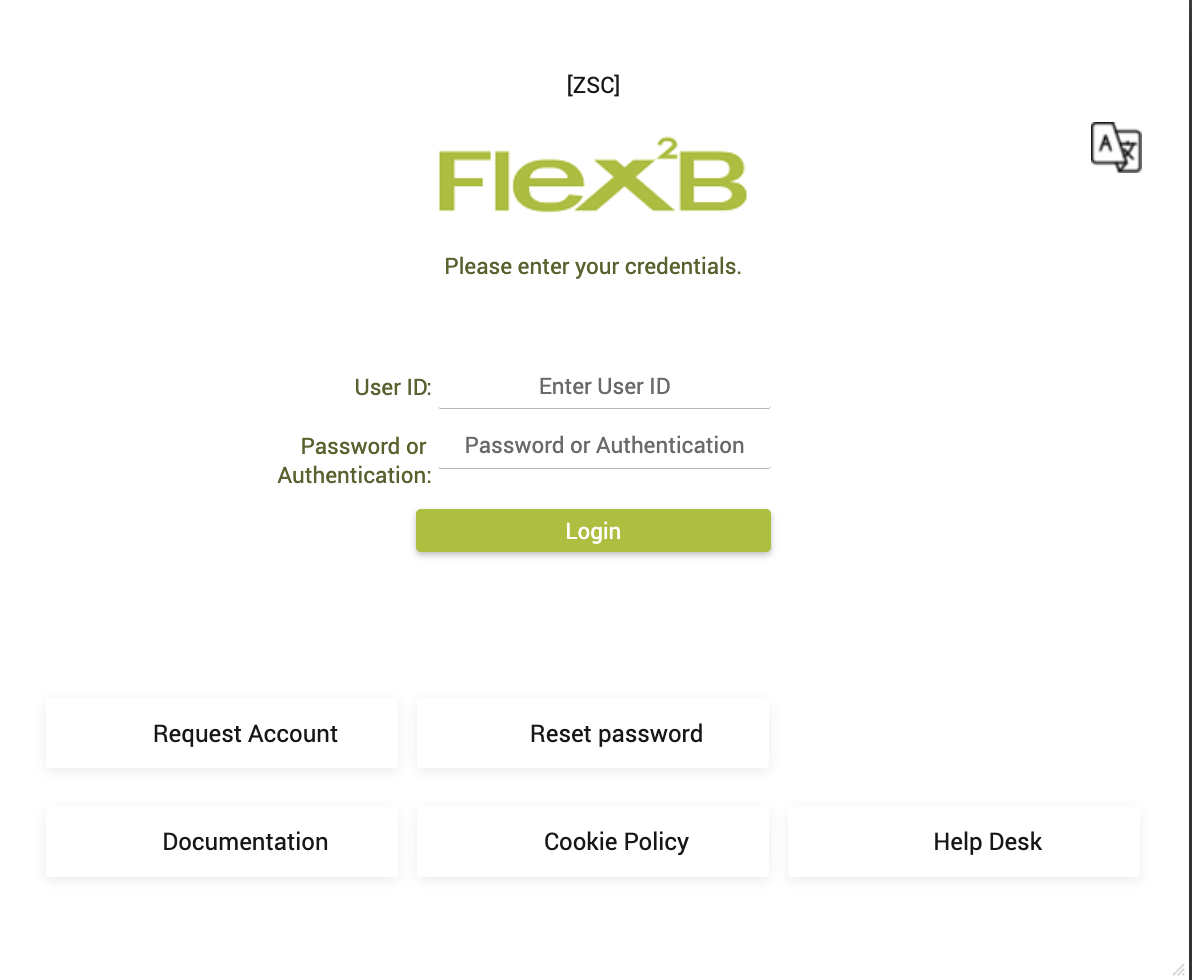
- Logon into the web component
Enter username and password and press the login button.
Depending on the Company Policy, 2 factor authentication can be enabled. Your login screen may have some more possibilities or may vary a little.
More information on 2-factor-authentication, click here
The capabilities of the standard menu system have been incorporated into a friendly hamburger menu, which appears as a single button ![]() in the upper left corner of Flex²B.
in the upper left corner of Flex²B.
All access granted modules to the user, are available upon login via this hamburger start icon.
Via the hamburger menu, you will have your own version of the drop-down menu, that can look such as:
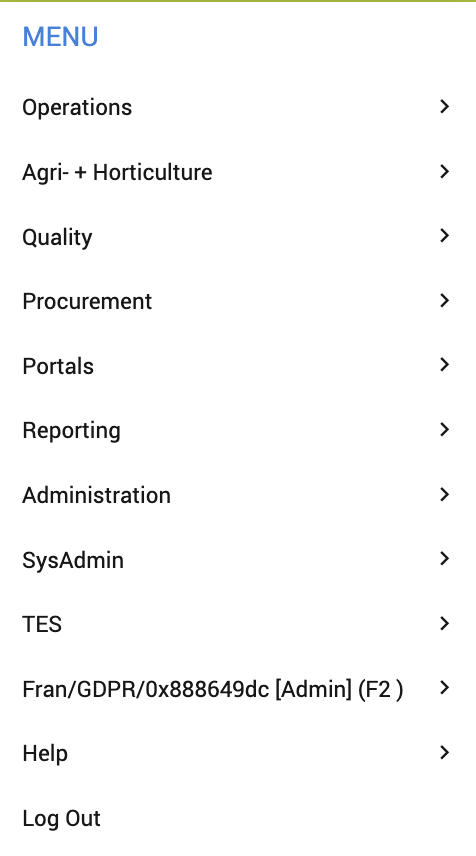
Colours, Icons, ... may be different at your location.
Flex²B is highly customisable because it is using CSS (Cascading Style Sheets),
that can be configured per implementation to comply with Corporate colour schemes ...
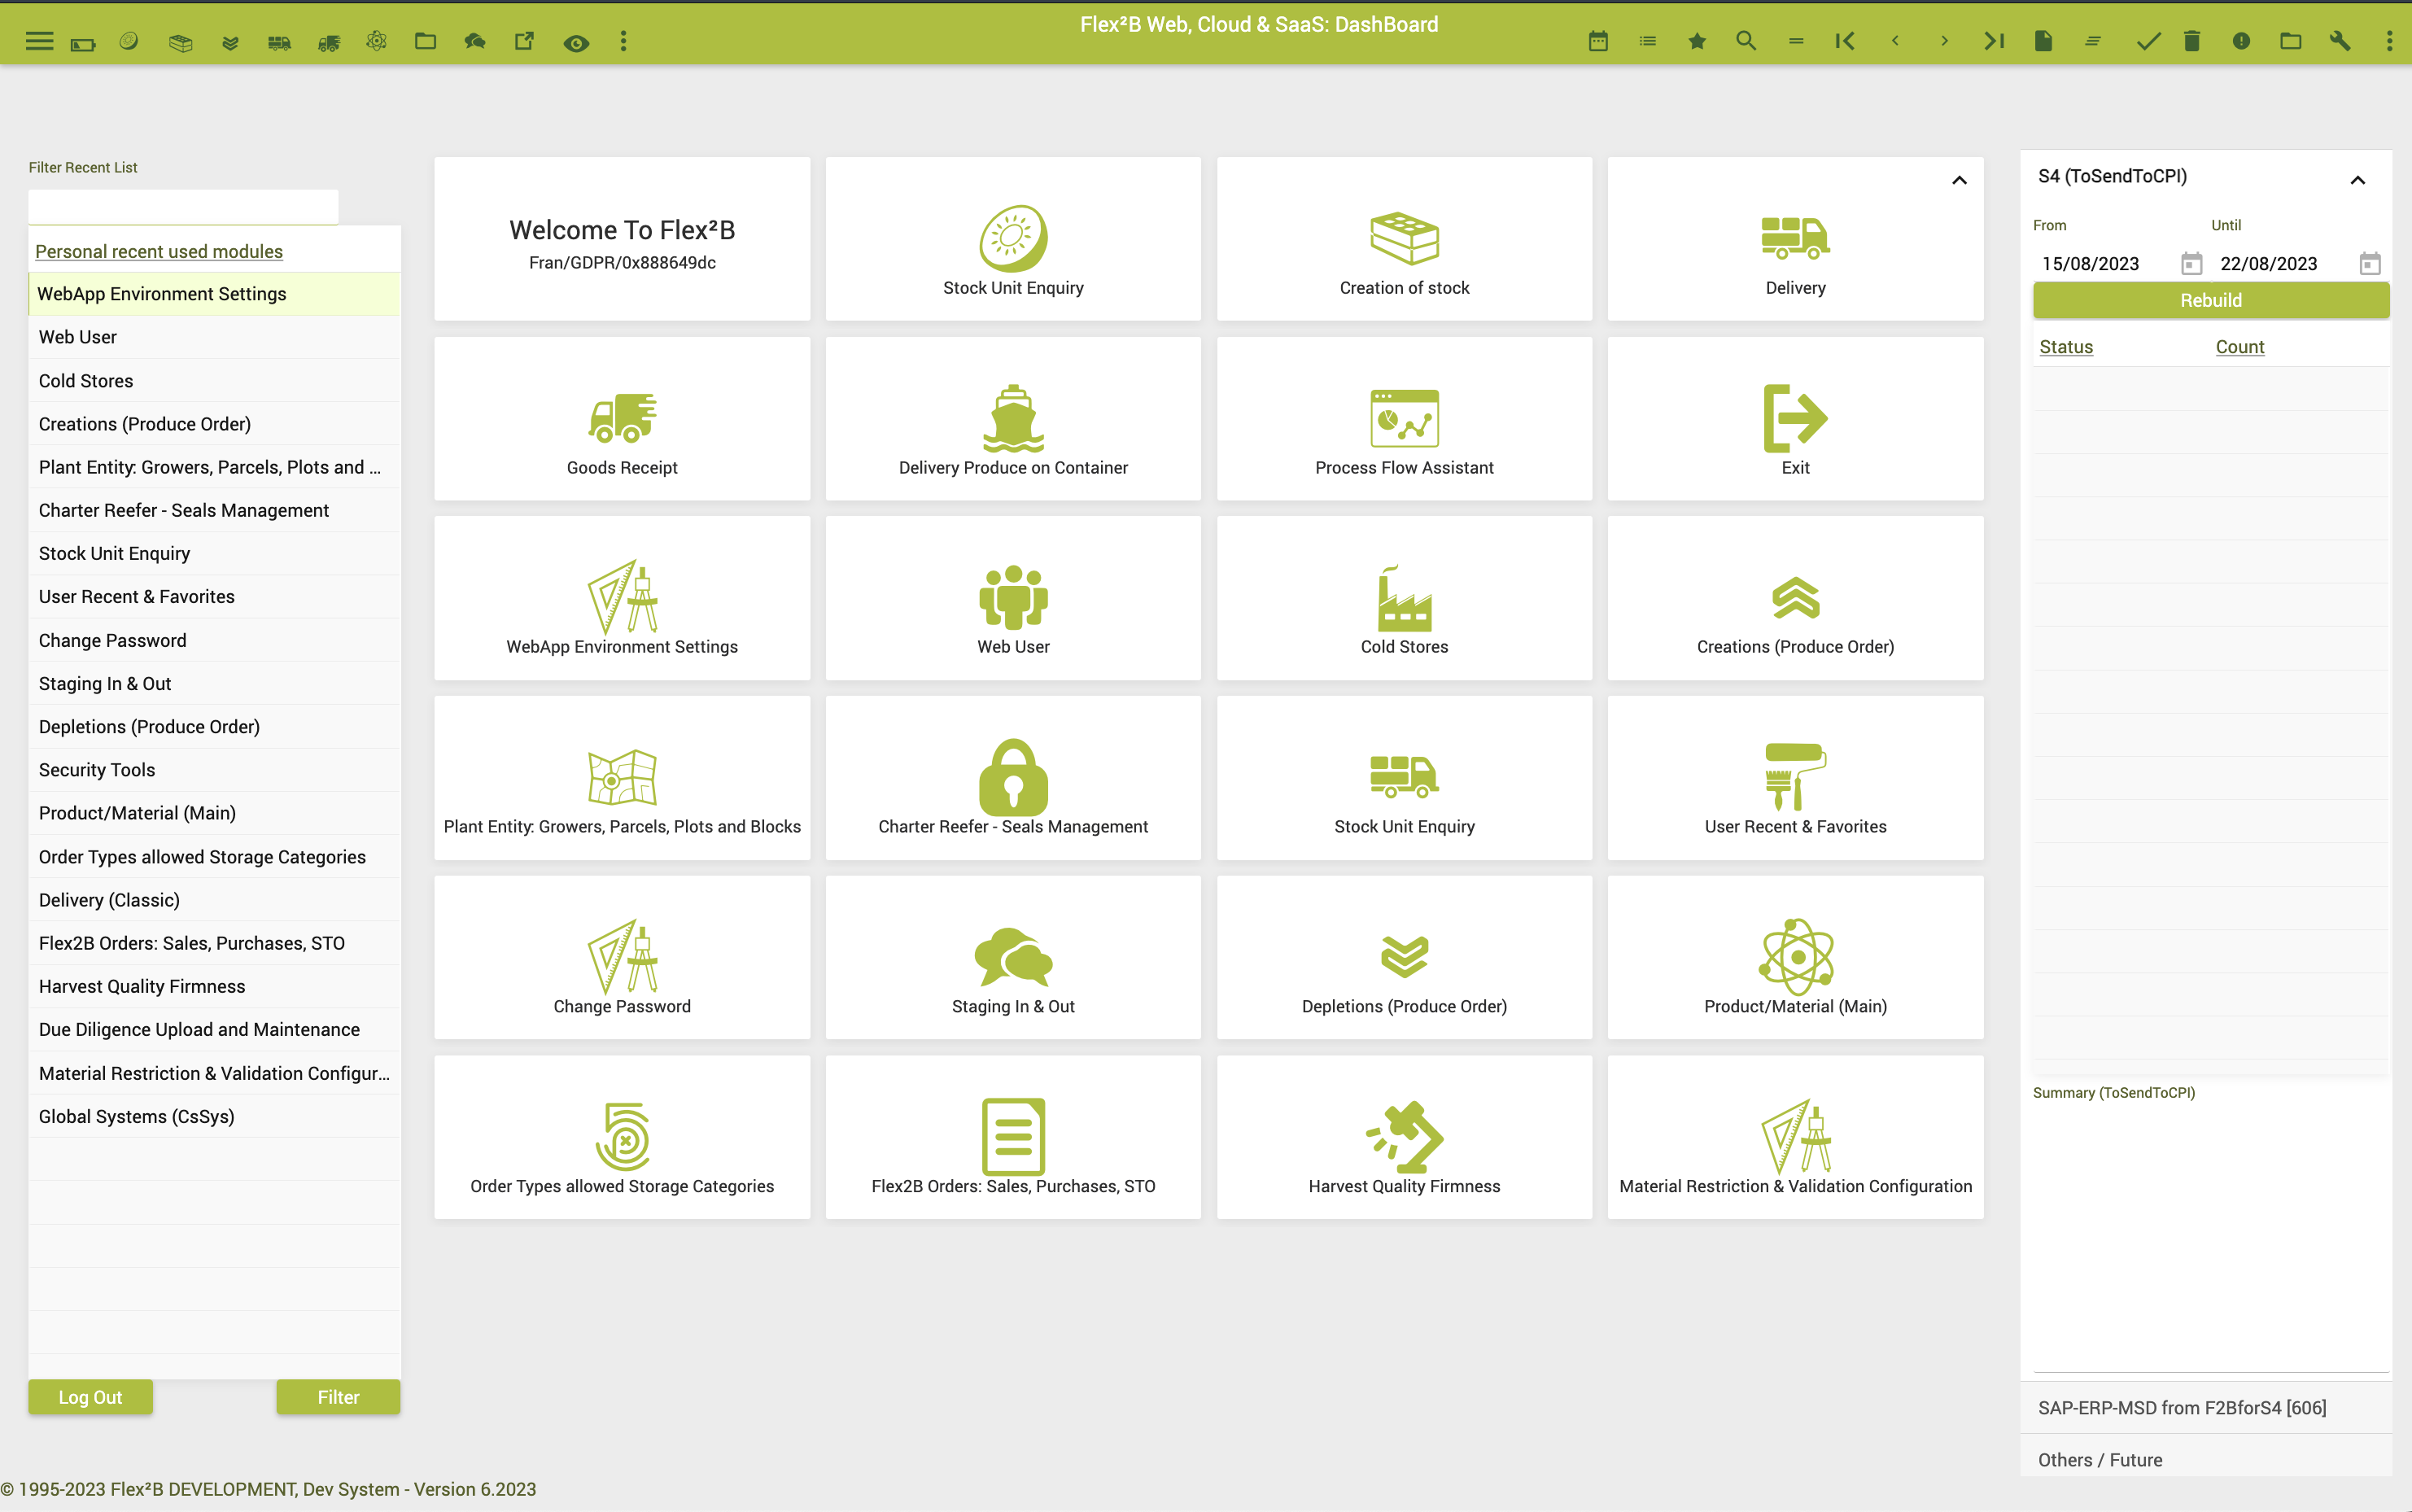
An action menu system is represented as menu-bar icons and menu items that appear at the top right corner of your application. The content of these items is controlled by the currently active view.
![]()
|
|
DashBoard |
|
|
Search, lookup list |
|
|
Find |
|
|
Find First |
|
|
Find Previous |
|
|
Find Next |
|
|
Find Last |
|
|
Clear, clearing the current record, which returns you to the blank record stage. This gets the view ready for the user to enter a new record. |
|
|
Clear All, clearing the current child records and parent record, which returns you to the blank record stage. This gets the view ready for the user to enter new records. |
|
|
Save button is for saving the current database record. |
|
|
Delete button is deleting the current database record. |
|
|
SysAdmin Tools |
|
|
LogOut, close the application and return to the login screen. |
|
|
More Options |
Column and row navigation occurs when the user navigates the focused cell from one column to another and/or one row to another. Navigation can occur via keyboard actions or mouse clicks.
[Tab] & [Shift+Tab]-key will navigate to the next or previous cell.
Click on the menu button.
Typically, the menu button will display three horizontal lines (ala hamburger menu), as shown in the image below
Depending on your access rights, more or less options can be shown in a menu or security context.
You will get following view:
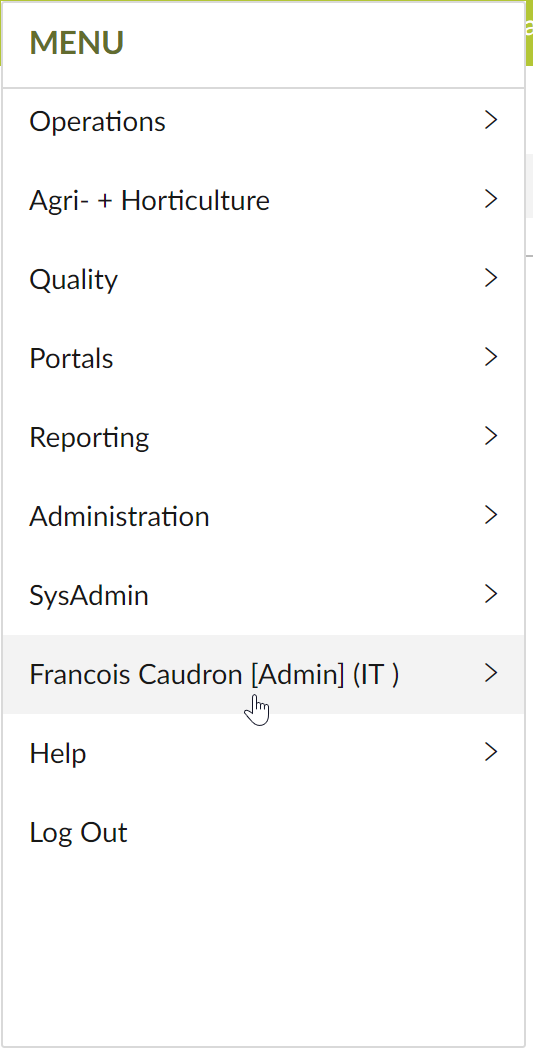
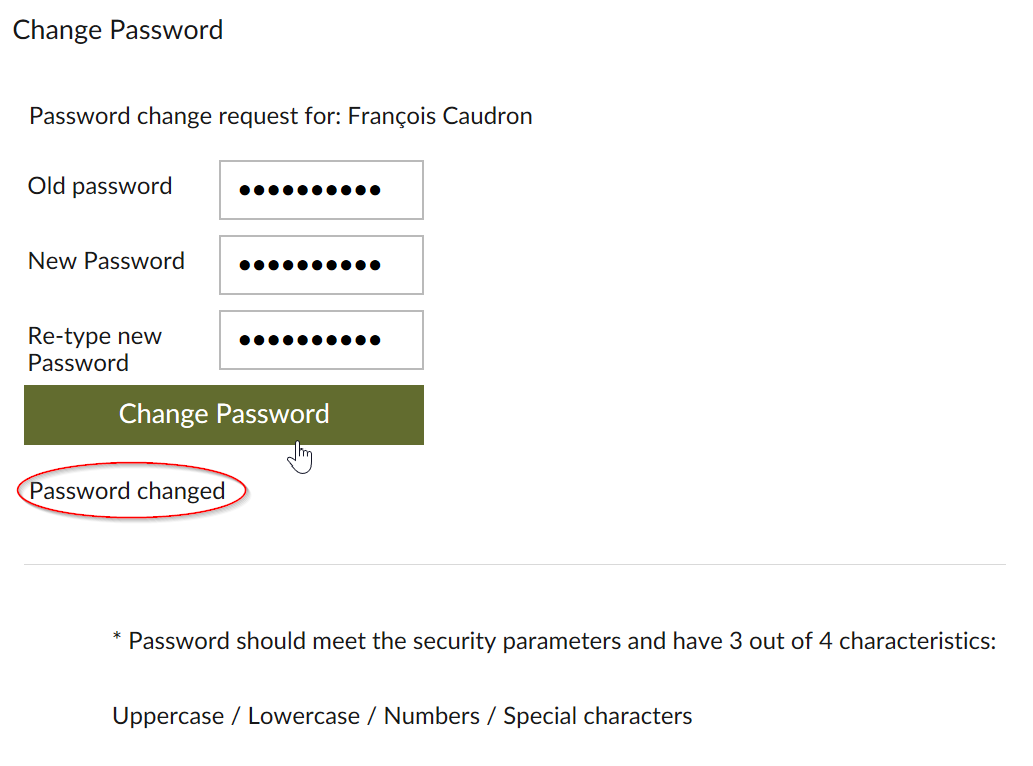
Click on your name 🡺
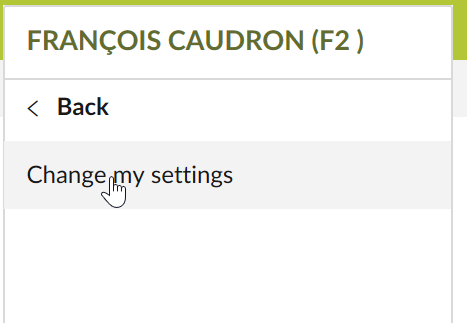
Click on ‘Change my settings’
You will get following view:
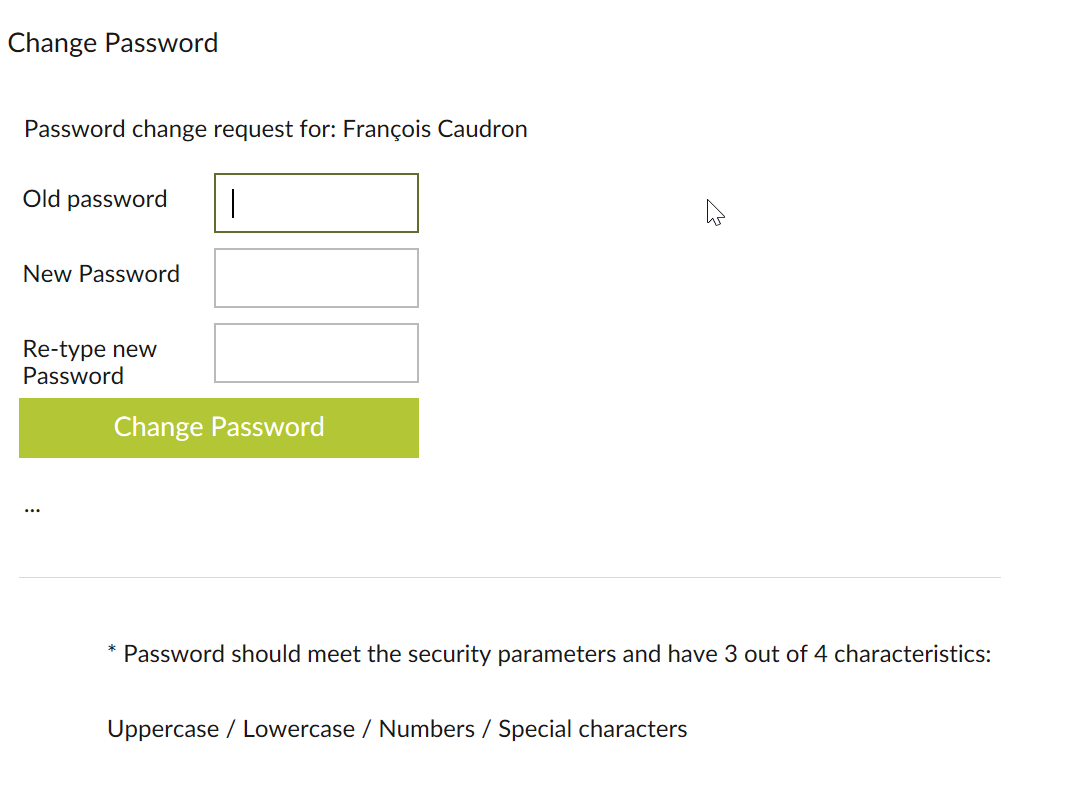
Type in your old password, type and retype your new password.
Keep in mind that company policy rules apply. They can change from one implementation to another, but in general here are some guidelines:
- Password requires minimum length : 12
Password requires minimum: 1 chars of type a-z (seen as a lowercase character) - Password requires minimum: 1 chars of type A-Z (seen as an uppercase character)
Password requires minimum: 1 chars of type 0-9 (seen as a numerical character) - Password requires minimum: 1 special characters of type such as ‘&|@#{[{}[]\’
!! Password usage of predefined words are illegibale.
!! Password can be replaced by a Passphrase. This is a typical very long password that is currently seen as more secure then shorter complex passwords. When entering a secret that meet the passphrase rules, the password complexity is NOT mandatory.
Click on ‘Change Password’ button.
Message will appear if password is changed (see below)